V1.01 1-Aug-02
All these designs are just ideas that you may like to try out for your robot. The dimensions of them are generally related to the wavelength of the signal you are receiving. These wavelengths are:
| Frequency | Wavelength, λ |
| 40MHz | 7.5m |
| 72MHz | 4.17m |
| 75MHz | 4m |
| 459MHz | 0.65m |
Due to the rather large wavelengths below 100MHz, many of these designs may not be feasible for those frequency bands.
Several of these designs involve having gaps between metallic sheets. A good armour to use is steel sheet screwed onto a plywood backing. The steel sheet protects against abrasive and cutting weapons, and the plywood sheet gives the steel rigidity when it is hit with punching and impact weapons such as axes. Also this armour design allows areas of the steel sheet to be cut away leaving the plywood base for use as built-in antennas.
Testing how well the antennas perform can be rather laborious if your radio receiver does not have a Received Signal Strength Indicator (RSSI) output. Without an RSSI, you will have to test the effectiveness based on response range. This involves getting a friend to take the transmitter a long distance away (preferably with the Tx antenna retracted to reduce the range), and getting them to walk towards the receiver antenna until the signal is detected. The distance between teh receiver and transmitter is then a measure of how well the receiver antenna is performing. You may like to grade this against the performance using the whip antenna supplied with the radio gear.
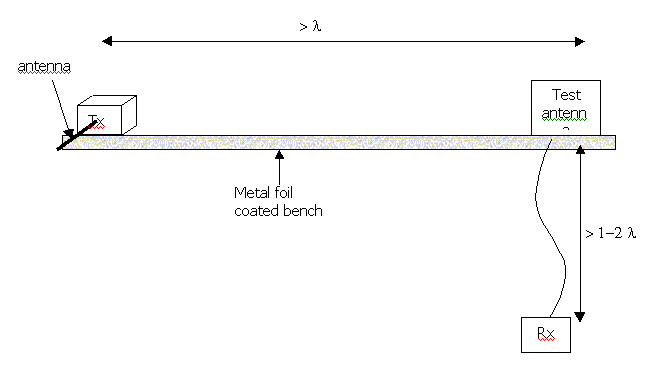
Measuring the performance with an RSSi is a lot easier. Simply attach a voltmeter to the RSSI output, and see how strong the received signal is. You may like to build a test bench as shown in the diagram below:
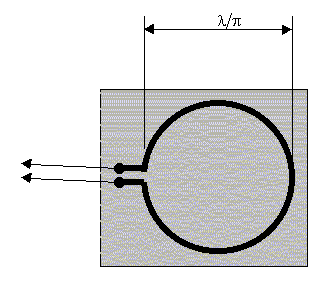
This involves cutting a keyhole shape into a metallic sheet.
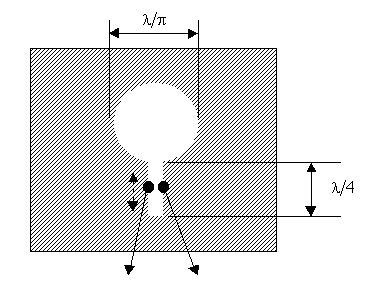
Different shaped cutouts:

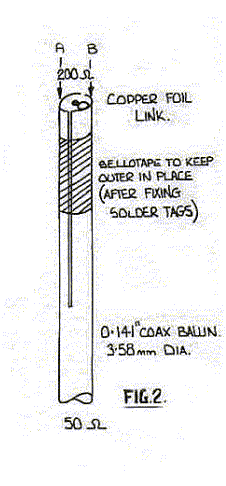
Note that the impedance of a slot antenna, Rs is different from the impedance of the equivalent dipole antenna Rd, according to the equation:
Rs = (60p)2/ Rd
Therefore, to match 50Ω, an impedance of 710Ω is required.
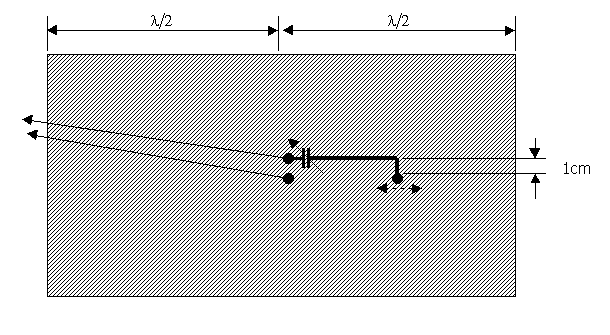
This is a metal tube with a slot cut into it in the length direction:
A description of the construction of this particular antenna can be found here.
This involves fixing a wire at a point on the metal plate, which should be variable to tune the antenna. At the other end of the wire is a variable capacitor, again for tuning. The other side of the variable capacitor and a point on the plate underneath the capacitor are taken off via coaxial cable to the radio receiver.
Tuning involves moving the contact point on the plate and tweaking the variable capacitor. The cap and wire may be inside the body of the robot.
A loop may be made with stiff wire, or a copper track on a PCB mounted on toop of the robot.
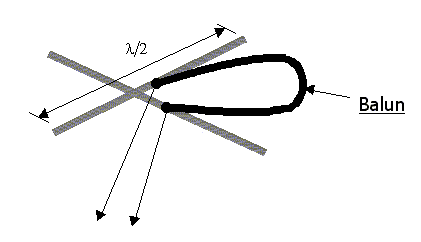
This may be rather awkward to make. The crossing point of the dipoles are connected via the balun, not driectly.
This is often used on the tailplanes of military aircraft, with one plate each side of the tail fin. The gap between the plates can be adjusted for tuning and bandwidth.

The double plates can be put in opposite corners, and connected together using one of the schemes identified here.
The Plate design above can be modified to use the entire body of the robot as shown below. The dimension 'd' and the other distances I'm not sure about. Certainly 'd' and the variable capacitor are used for tuning. This woul dmake a superb antenna if it works since there are no external parts to be damaged. Try it and see!

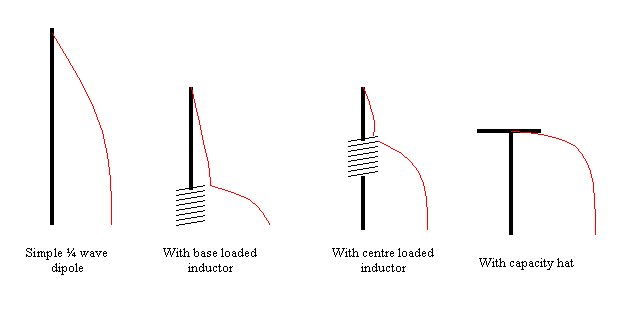
All antennas have voltages and currents flowing through them when they are operating. The voltage and current distribution over them changes. For example, a dipole has a current distruibution as shown in the diagram below:
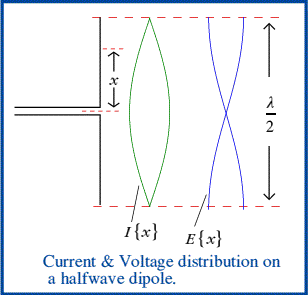
A grounded quarter-wave dipole is just the top half of the dipole in the diagram. Therefore, at the top end of the antenna, the voltage is maximum and the current is zero (of course there can be no current at the end of a piece of wire!), and at the bottom end the current is maximum and the voltage is zero.
If the dipole is then base-loaded with an inductor as described in section 2 of the radios page, the pickup from any length of antenna that the inductor replaces will be lost. Note that this is also the part of the antenna through whcih more current is passing (i.e. the bottom), and therefore the loss of signal detected is even worse. Sometimes to compensate for this, the inductor is placed half way up the dipole, a method often used on car aerials which have a helically wound section half way up. This leaves the inductor rather vulnerable for our purposes however.
Another way this is often compensated for is to use a capacity hat. This is a disc mounted on top of the dipole which has a large capacitance. This capacitance replaces a length of antenna at the top of the dipole, where the current is low anyway. Therefore the section of dipole directly below the capacity hat has a much larger current, and the antenna picks up more signal. You may have seen capacity hats implemented as a set of radial wires from the top of the dipole in large broadcast radio transmitters.
The diagram below shows the current distribution in red with the strength of the current represented by the distance away from the dipole:
The size of the hat is rather complex and is one for experimentation! A document describing capacity hats can be found here.
An example of a capacity hat dipole in use in a fighting robot is shown here.